Karnage I felt sorry for you since your heart was in the right place, but you just weren't prepared properly. So to give you a hand I took some pics of a pc I built today maybe you will find it interesting

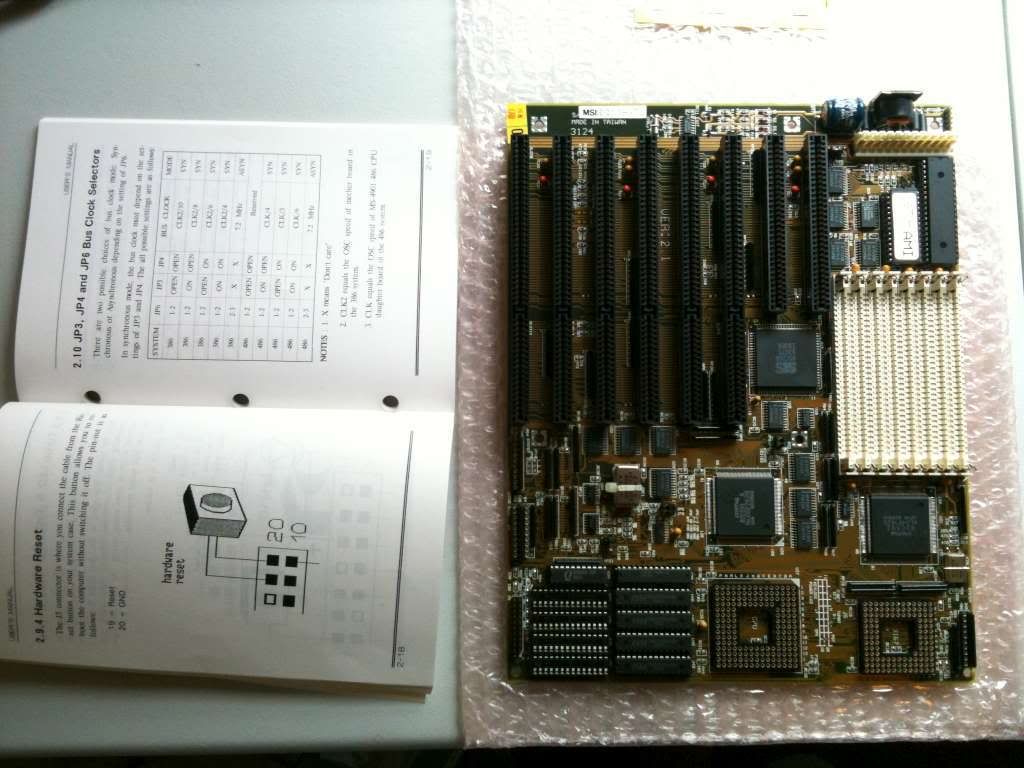
Firstly, here's the motherboard and its manual. The manual is FULL of info you will need such as jumper settings and header pinouts.
When I get a brand new motherboard I like to run it outside the case to make sure everything is working before going through all the effort of mounting it. Its also easier to install CPU, RAM etc outside the case. Just place it on top of the bag it came in, being very careful not to let anything touch it while its running.
The bare minimum you need for a system to boot is a CPU, memory, power supply and video card. Obviously you should also connect the speaker to the motherboard because if the system has a problem it will beep at you, and you can check the beep codes to determine the fault. Keyboard is handy also in case its all working and you want to go into the BIOS or whatever.
If you get stuff come up on screen you know that these parts are fine so if you have trouble further down the track you can rule them out. If you continue to have issues you can go back to this baseline until the system starts booting again.
Anyway, first you should install the CPU. Some people have SMP systems with multiple CPU's, or co-processors. You probably won't need to worry about that though. Here you can see I've chosen an AMD CPU as I think they offer better value for money at the moment.
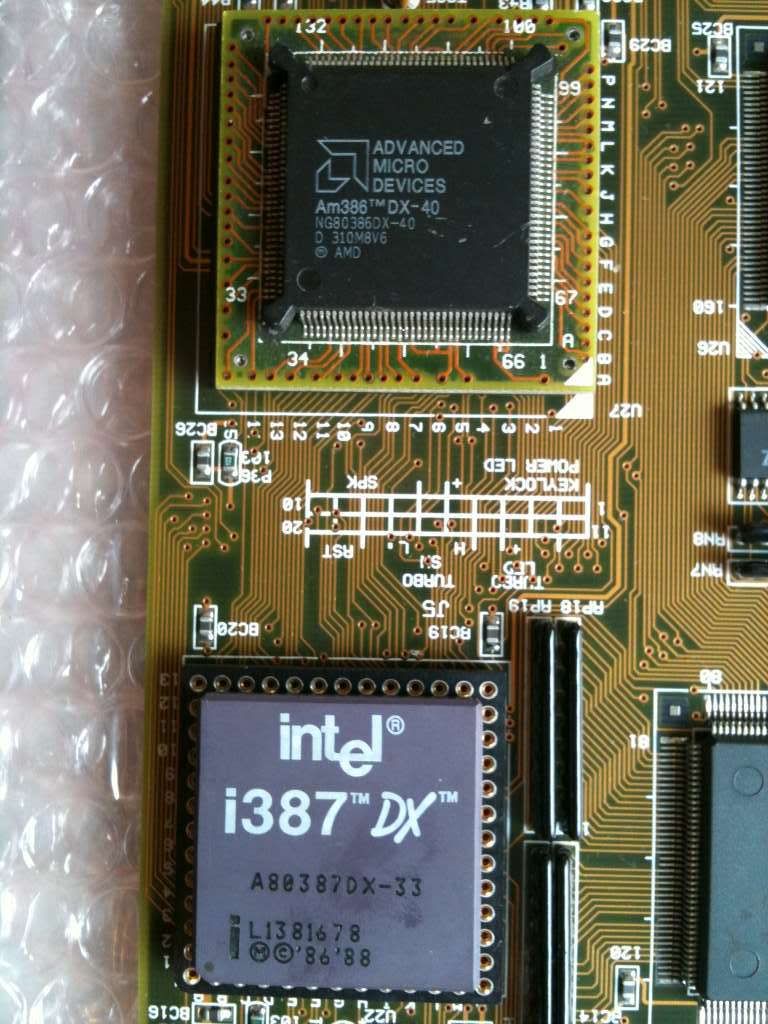
Be careful to make sure the pins line up correctly, usually there is a marking or some sort of keying that prevents the CPU being inserted incorrectly. At this point, you should install the heatsink if necessary - fortunately, this system does not require any extra cooling
At this point you should set any jumpers on the motherboard pertaining to CPU settings if necessary - check your manual for these details. If your jumpers are not set correctly you could be overclocking or overvolting your CPU without knowing it and cause damage - if it boots at all.
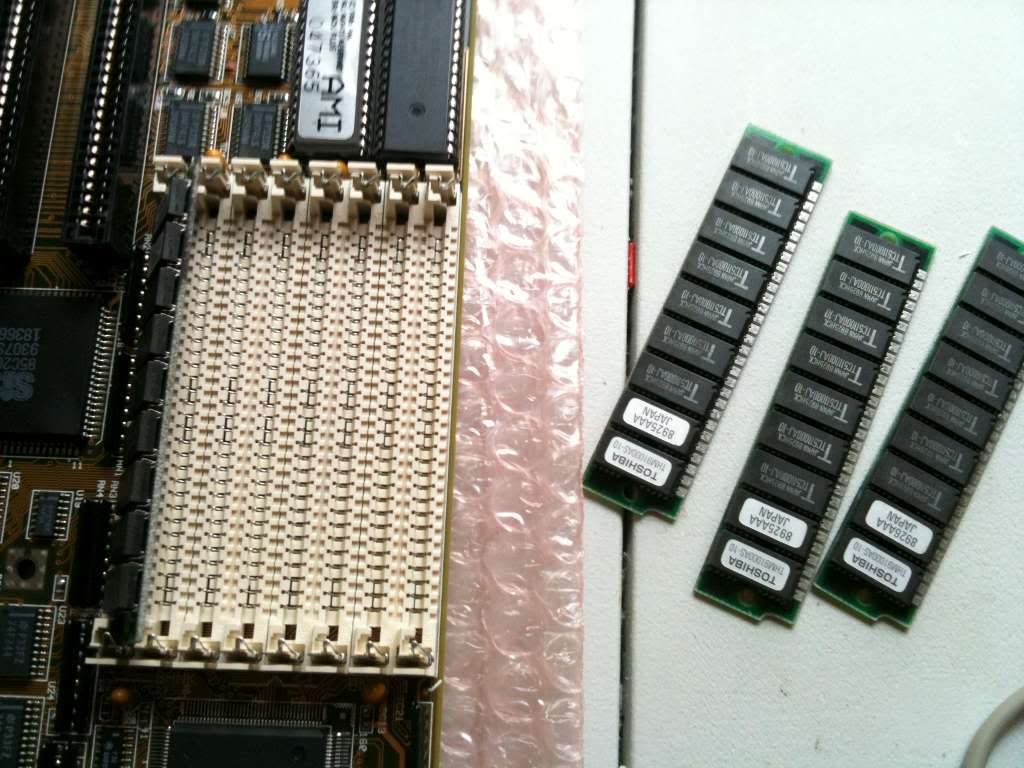
Now you should install your RAM. Some systems use multi-channel RAM, so be careful to install the correct number of modules in the correct slots. This system needs four identical modules installed in each bank to work correctly.
Now you can whack in a video card. One could write a novel on the subject of AMD versus nVidia however I have gone one better and used a Tseng Laboratories card - an ET4000AX. It doesn't support DirectX but it does have excellent VESA support.

At this point you can plug in a speaker and the power supply. If you have two similar connectors that go side-by-side on the motherboard, the rule is the black wires go together. Plugging these in backwards will let the magical smoke out of the board.
At this point you can apply the power and see if its working
Note that if you have a power switch attached to the PSU it has mains voltage going through it so its best to avoid touching them with your bare hands - just plug/unplug the PSU to switch it on/off until you get it in a case. Some newer, less interesting systems have 'soft power' where the power switch is connected to a header on the motherboard, and has much lower, safer voltage going through it. You can start the system by touching the power switch headers on the motherboard with a screwdriver. Check your manual for the correct headers; touching the wrong place with a screwdriver while power is applied may cause varying results.
Success!
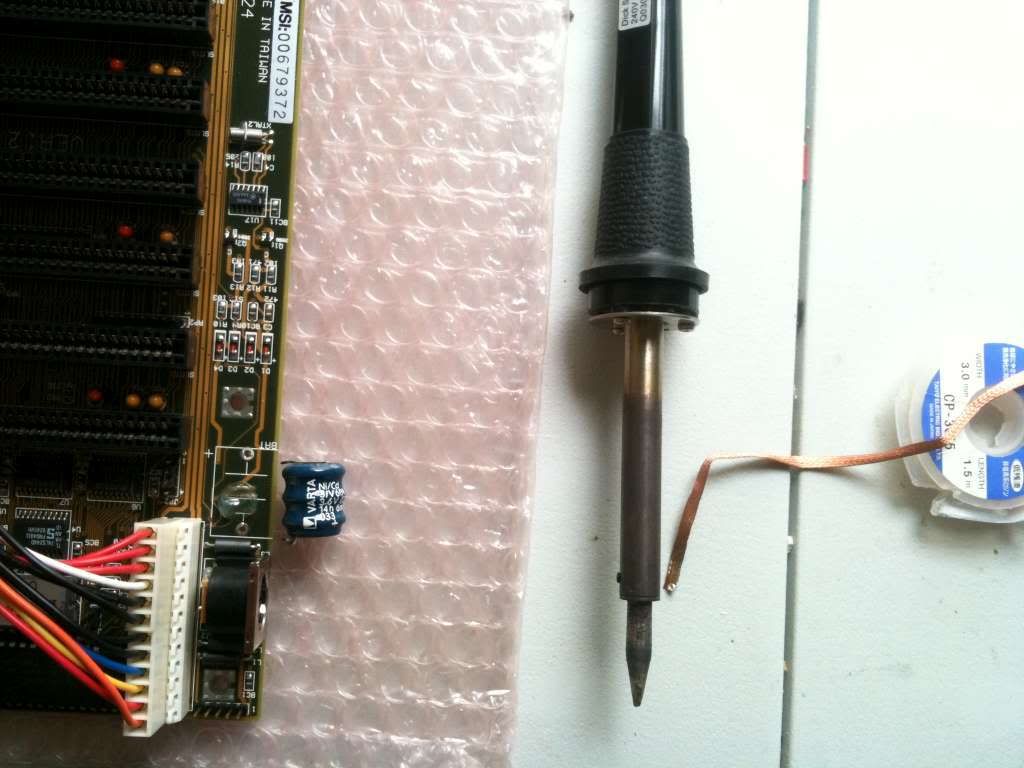
At this point you should check that the battery on the motherboard is still good; if the system reports 'CMOS CHECKSUM ERROR' or keeps forgetting the date after each reboot you will need to replace the battery. Here you can see that I have desoldered the dead battery from the board and will fit a new external battery. Some boards have button cell batteries which can be replaced without soldering; these boards are boring and should be avoided.
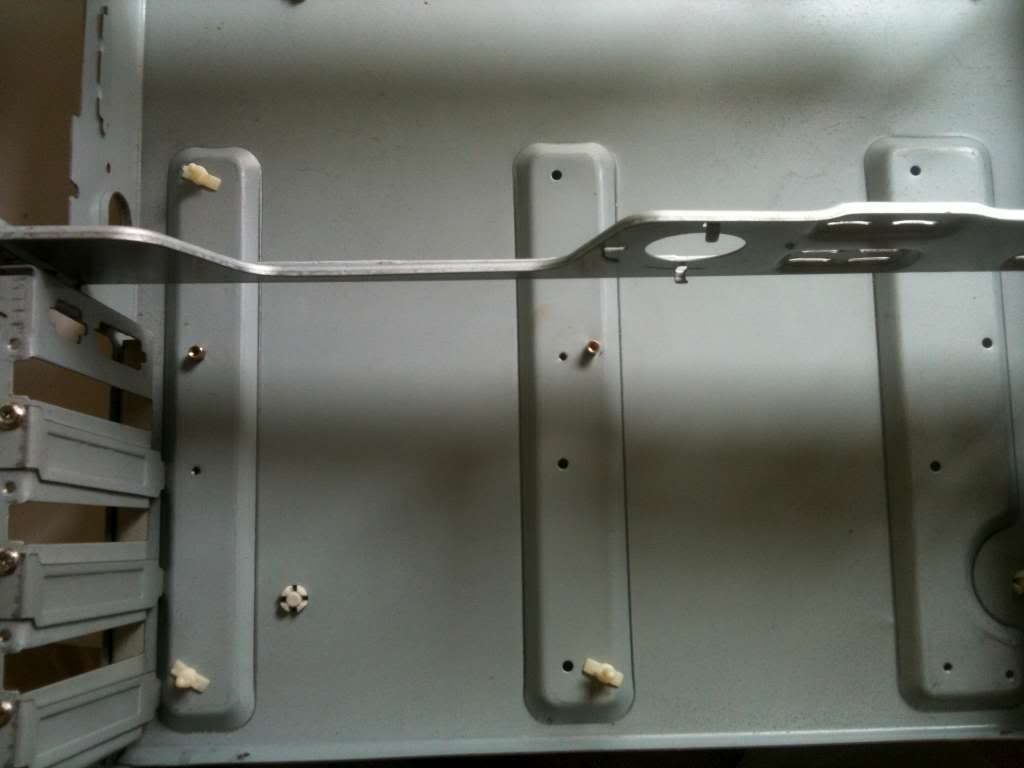
Now that we have ascertained the motherboard, cpu and RAM are functional we can prepare the case. You will need to screw standoffs into the correct location in the case, to line up with the holes in the motherboard. If you leave a standoff in the wrong place it may short out the board, so double check before you start screwing the board in. Here you can see I have used both copper and plastic standoffs.
At this point you can fit the motherboard into the case, be sure to screw it in properly and hat it is not shorting out on the case.
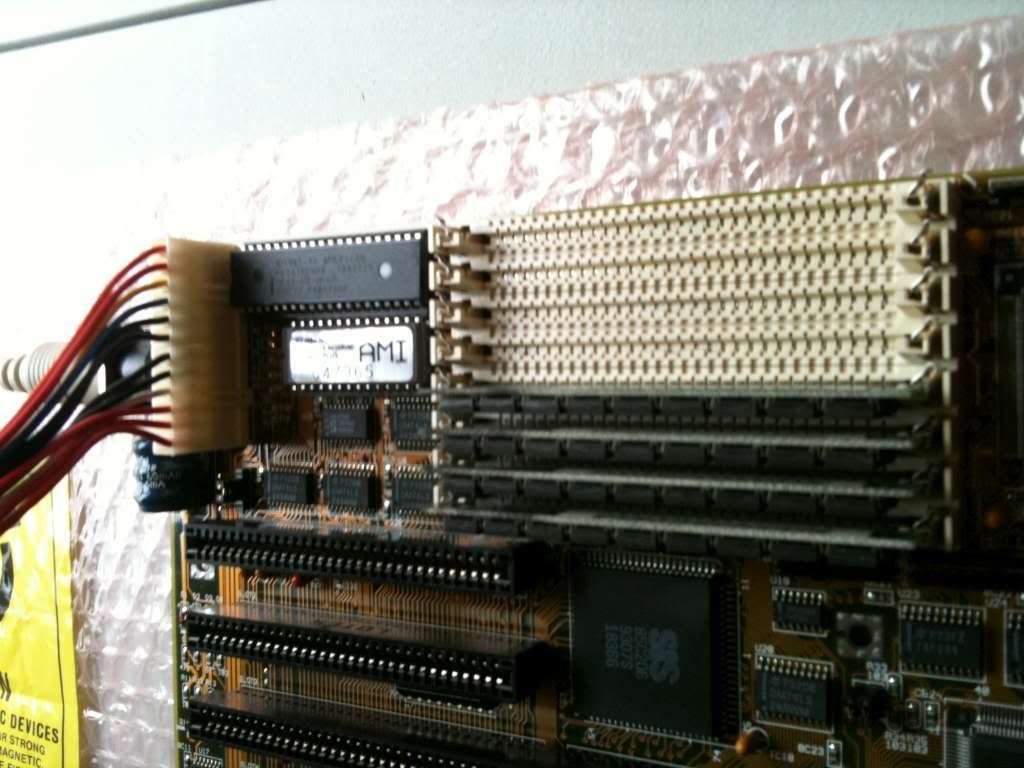
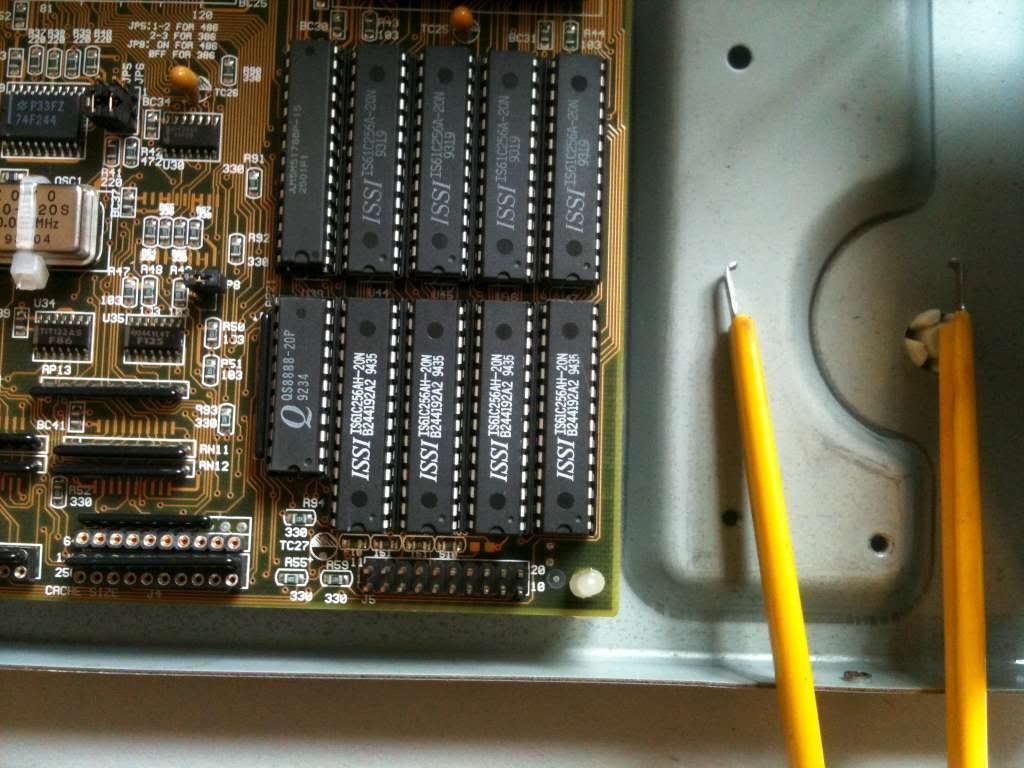
I took this opportunity to install some additional SRAM on my motherboard. A lot of motherboards come with onboard SRAM cache memory to enhance performance. This memory is several times faster than main memory although is much miore expensive and thus there is usually much less of it. This board only had 128kb of cache memory so I installed an additional 128kb to give 256kb total:
Once that is done you can begin fitting the front panel connectors - check your manual for information as this varies between different boards.
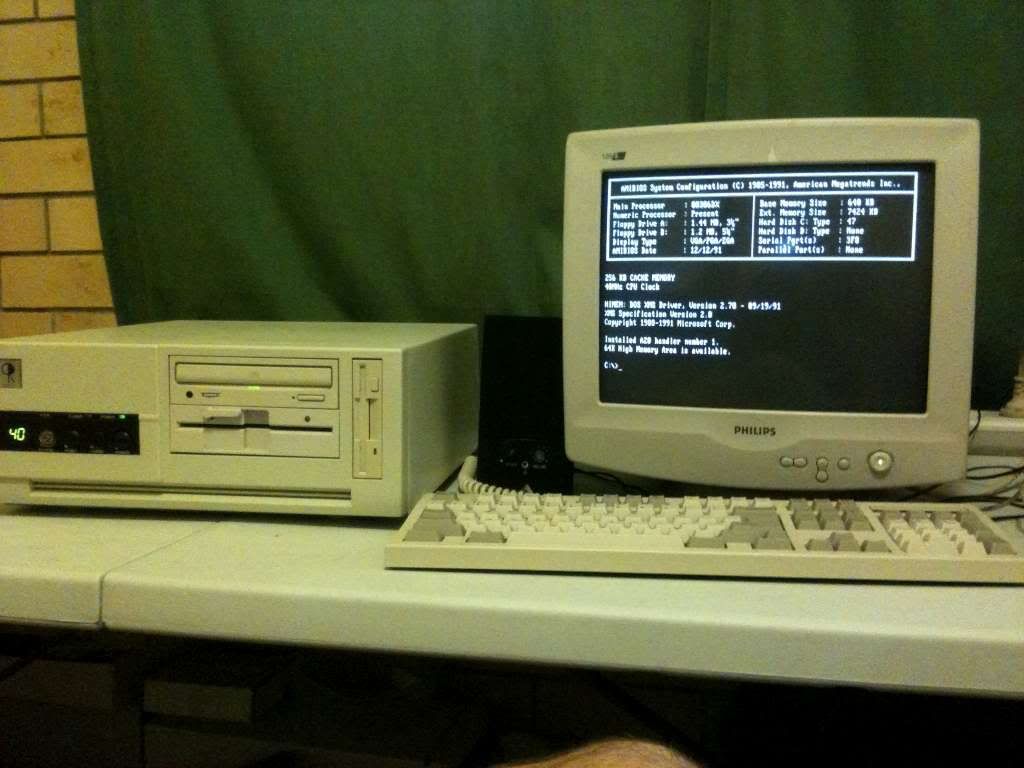
Also, if your case has a digital speed display for turbo mode you can set the jumpers to change what it displays. Often they are set to HI and LO by default but you can set them to whatever you like, people often like to set them to the clockspeed of the CPU. Mine was set to HI in turbo mode however this was entirely too friendly like some sort of computer greeting (I don't want people to think they are welcome in my house) so I have set mine to say 40 (for 40MHZ
)

Let's hit the pwoer and see if everything is happy:
Yep!

Extra cache is working perfectly.
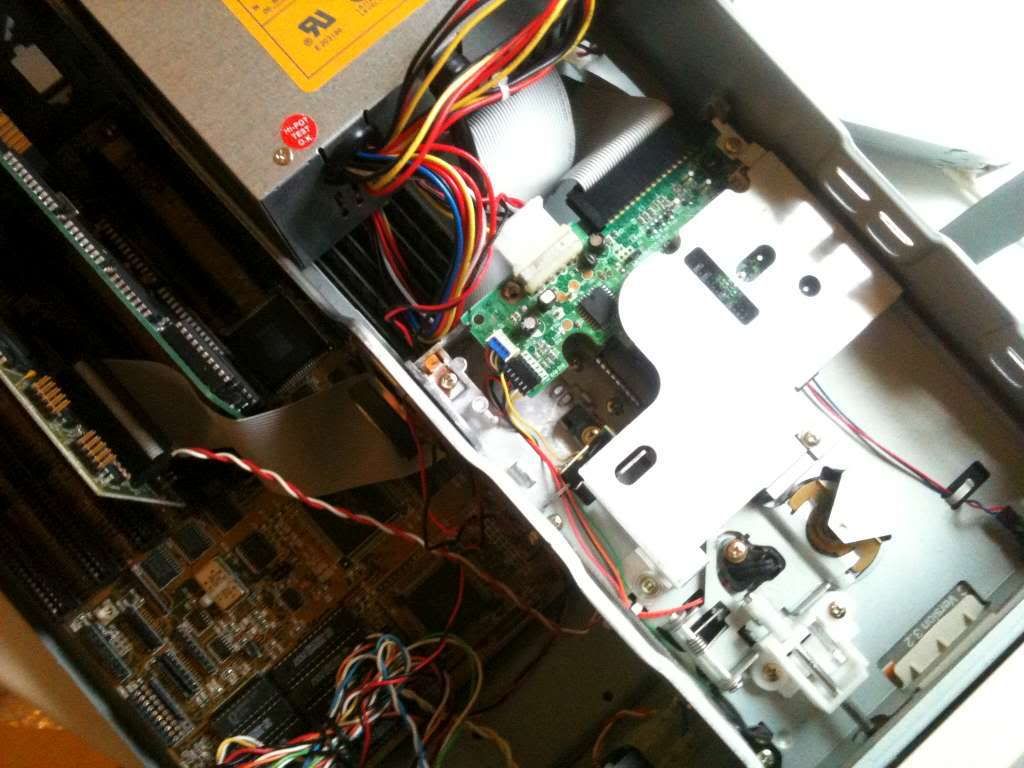
Now its time to install some disk drives. A lot of motherboards are coming out now with onboard serial, floppy and IDE ports. This system doesn't have any of those so instead we will install a controller card that will take care of all that for us:

Again, take care to ensure all the jumpers are set correctly to enable/disable certain ports, and set the memory I/O address ranges and IRQ's. Check your manual for details. Thankfully, this card had the settings printed on the card itself which makes things a bit easier.
Anyway, whack that in and start installing your drives. Remember, the red wire on the ribbon cable is pin 1 and should be marked on the drive. The drive won't work if you get it backwards. Usually pin 1 is on the side closest to the power connector on the drive although some floppy drives are different. Also when installing floppies the end of the cable with the twist in the middle should be connected to drive A, any drive connected between the board and the twist will be drive B.
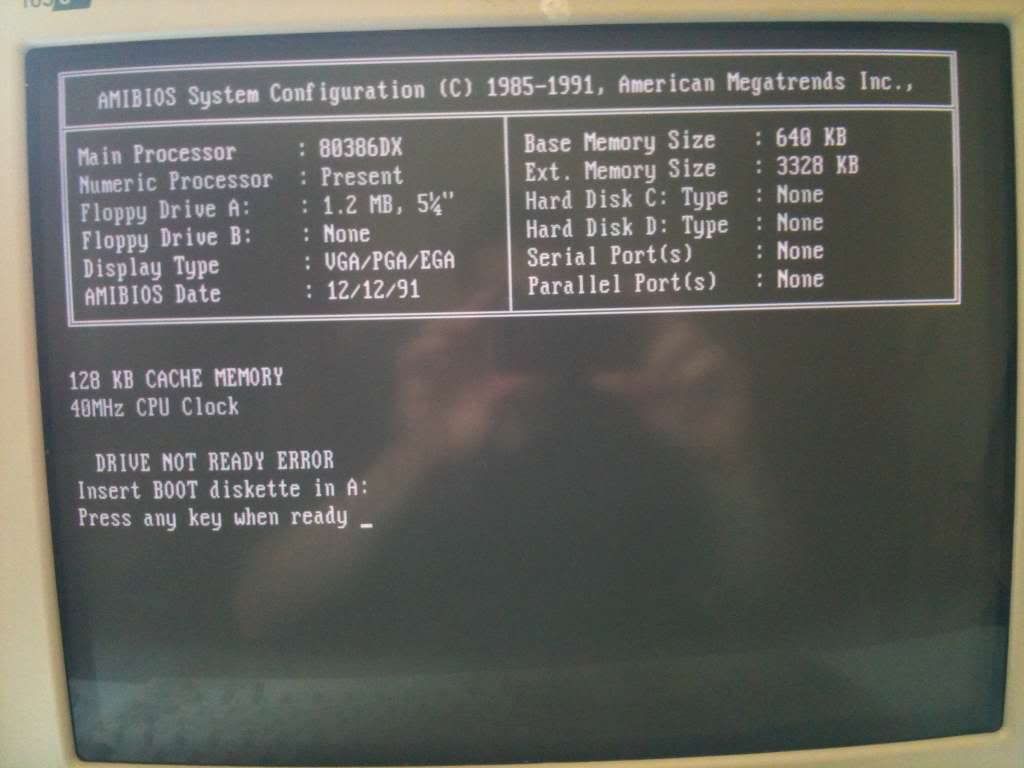
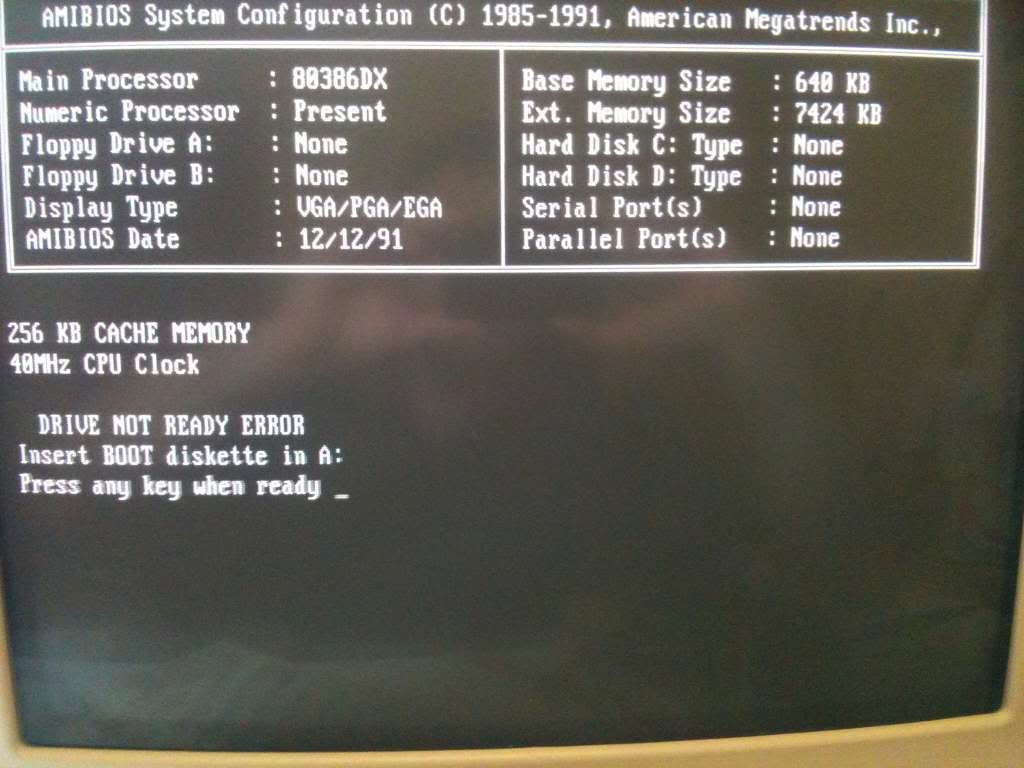
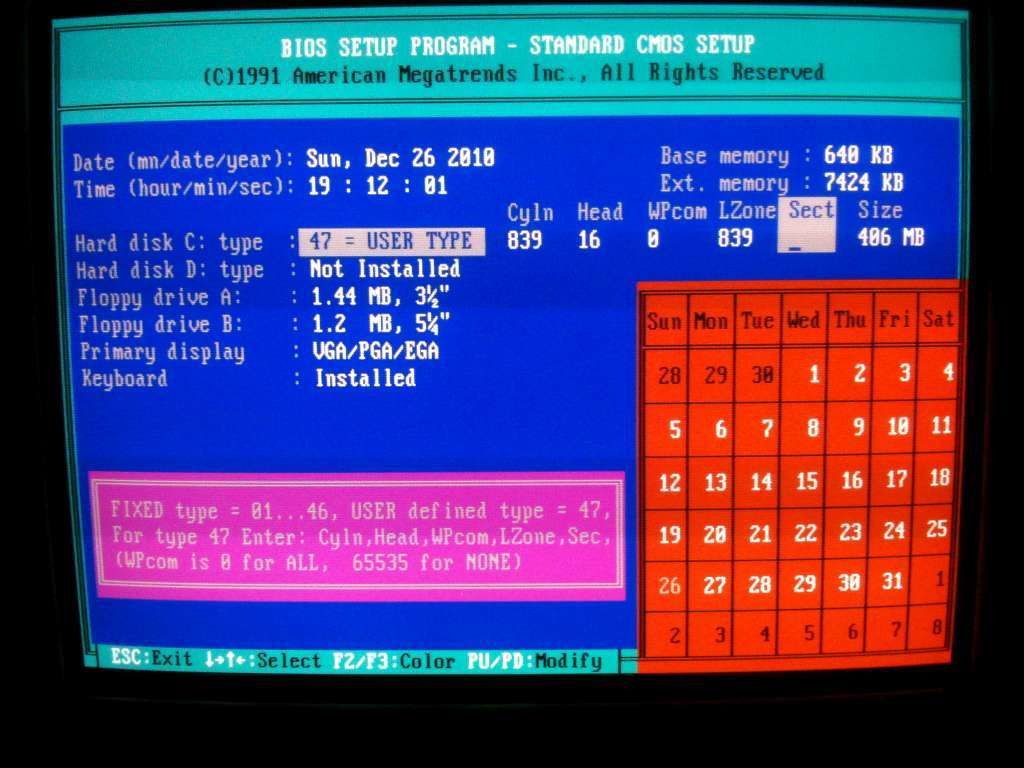
Fire it up and make sure all your drives are working properly. You will need to set your drives up in the BIOS setup, some of the more mundane motherboards will autodetect your hard drive but for real systems like this you will need to enter the cylinders/head/sectors information for your hard drive before it will work.
If all is working you can shut down and finish installing any other expansion cards you may have. I only have one other card, a sound card. There are a couple of different sound cards on the market these days but in my opinion Creative make the best ones, so I have installed a Sound Blaster Pro. This card also includes a Sony CDROM controller which will allow me to install a double-speed Sony CDROM. Apparently you can get CD-ROM drives that run off the IDE interface like a hard drive although that sounds pretty lame to me.

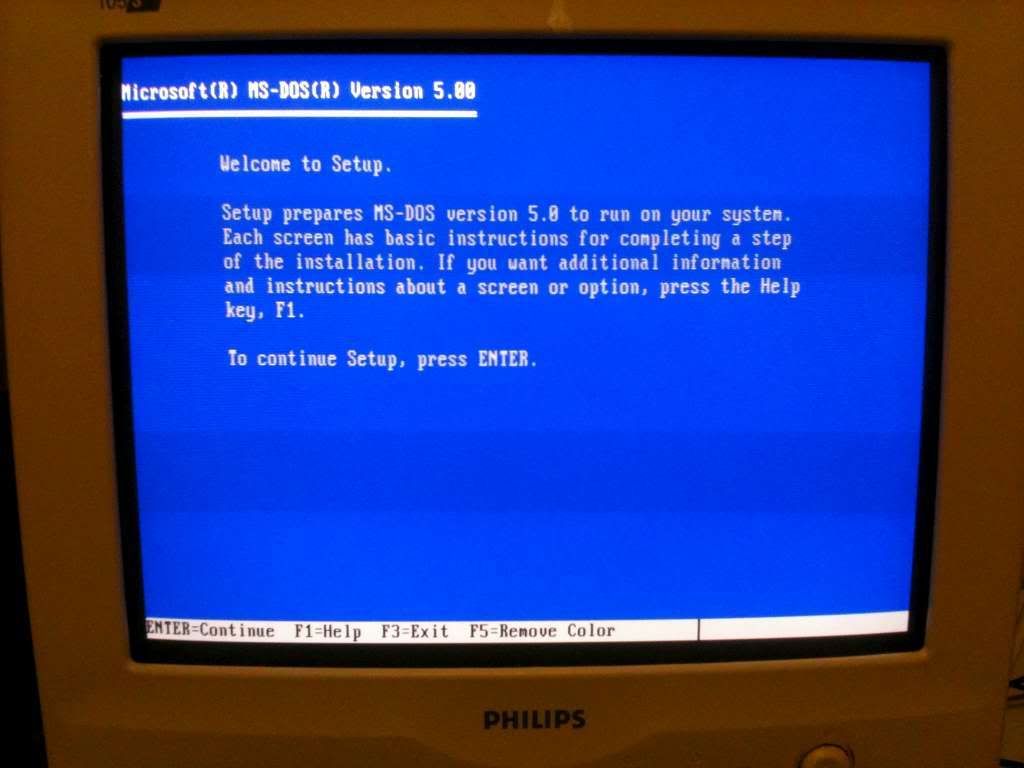
Now your machine should be physically together, and ready for you to install an operating system. Congratulations! the hard part is over, now you just have to stick a disk in and wait for it to install.
Now you can sit back and enjoy the fruits of your labour
 Downloads